

How to Take a Screenshot on a Mac (Guide)
macOS Mojave brings a number of new features which enhance the unabridged macOS experience and brand it more than productive and enjoyable to use. My favorite feature of macOS Mojave is the new dark fashion which allows me to work late at night without having to strain my eyes likewise much. Only like the new dark manner, macOS Mojave focuses more on enhancing features that existed beforehand rather than introducing new features of its own. If you've been wondering how to have a screenshot on a Mac and thinking if in that location's a print screen feature for Mac, you'll be glad to know that there are a bunch of different ways to take screenshots on Mac that you can try. And so let'due south take a look at how to screenshot on Mac:
How to Accept a Screenshot on a Mac
The ability to take screenshots has been a part of macOS since as long as I can remember. With macOS Mojave, Apple has improved upon this feature allowing users to not simply apace take screenshots but also annotate them. In this article non simply nosotros volition come across how to screenshot on Mac, but also how to modify the screenshot format, change its default destination, and more. So permit'south get corking, shall we?
How to Take a Screenshot on a Mac Using Keyboard Shortcuts
Equally I said, macOS Mojave makes it very easy to take screenshots. Long fourth dimension users of macOS will remember the sometime grab tool which was used to have screenshots. In macOS Mojave, Apple has replaced the Grab tool with a new tool called, "Screenshot". You can either launch the app to get admission to various screenshot tools or use keyboard shortcuts to get access to them. Since keyboard shortcuts are much faster, we will show y'all how you can utilize them to quickly capture screenshots:
1. How to Screen Capture Mac Desktop (Unabridged Brandish)
If y'all want to take a screenshot of the entire desktop or display of your Mac, all you demand to practise is use the keyboard shortcut Control+Shift+3. Once yous use this keyboard shortcut, macOS Mojave volition automatically capture a screenshot for you.
2. How to Screenshot of a Portion of Display
If y'all don't want to capture an entire desktop and simply want to take a partial screenshot on Mac, merely printing the following keys:
- control + shift + 4
Once you striking the shortcut, yous will notice that the mouse pointer has turned into a small screenshot tool. But elevate to cover the area that you want to capture a screenshot of and let information technology go. It will automatically take the screenshot of that area.
3. How to Screen Capture a Mac Window in macOS Mojave
While you lot tin can use the second method that we discussed above to take a screenshot of an app's window, in that location's a manner easier method to do that. Using this method will not only be faster but you will also get a more precise screenshot. To utilise this method, just do the following:
- press control + shift + iv
- In one case the screenshot tool appears, press space bar.
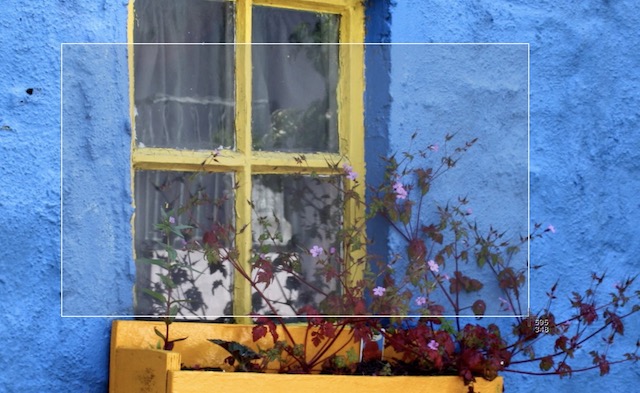
- Your cursor will at present turn into a camera and the app you hover your cursor over volition have a blueish overlay.
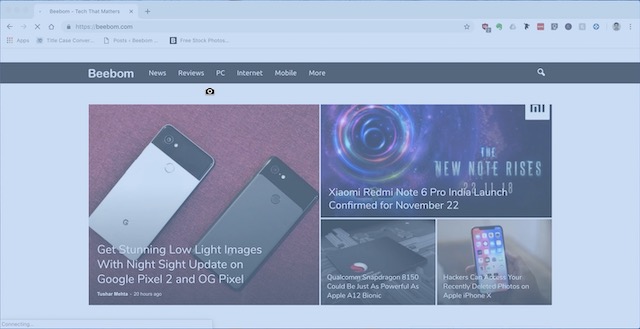
- Simply movement your cursor to hover over the window you want to screenshot on your Macbook and click on it.
Once you exercise that, it volition automatically capture the screenshot of the app'south window as shown in the picture beneath.
How to Launch the macOS Screenshot Tool
While the above keyboard shortcuts are easy to remember, if you find yourself forgetting them, you tin use the macOS screenshot tool besides. There are two means to do this:
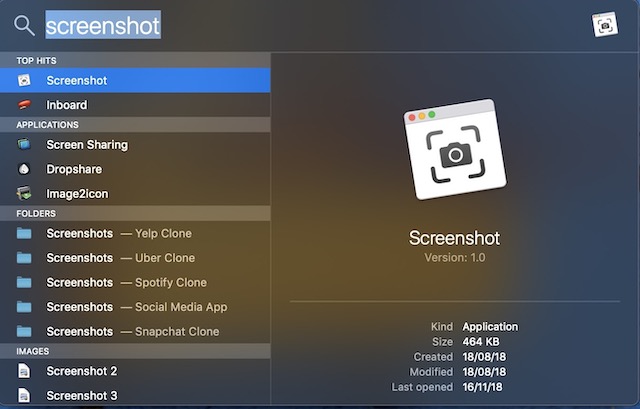
- Open up Spotlight and launch the Screenshot app.
- Or, you can press command + shift + 5 on your keyboard.
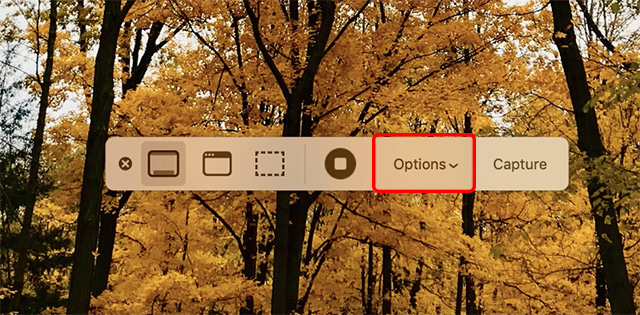
Once you launch the app, you will notice that there are five different buttons available. Y'all can easily run across what each push button does past hovering your cursor signal above each icon. From left to right these buttons serve the following purpose:

- Capture Entire Screen (The same as Command+Shift+three)
- Capture Selected Windows (The same as Command+Shift+four + Space Bar)
- Capture Selected Portion (The same equally Control+Shift+4)
- Tape Entire Screen
- Record Selected Portion
The first three are the screenshot features which most of us are going to use frequently and I have already discussed them in the previous department. The fourth and 5th options are for recording your screen rather than taking a screenshot. This is keen if yous want to readily create a video tutorial for someone. Do note, that there are no keyboard shortcuts attached to these features and you volition take to launch the macOS screenshot app to go access to them.
Use Timers to Have a Screenshot on a Mac
There are situations when you need to take a timed screenshot. Whatever your reason behind wanting to use a timer to take a macOS screenshot, you tin can easily practise this in macOS Mojave.
- Launch the macOS Screenshot tool and click on "Options."
- Select the timer duration. You tin set a screenshot timer for 5 seconds or 10 seconds.
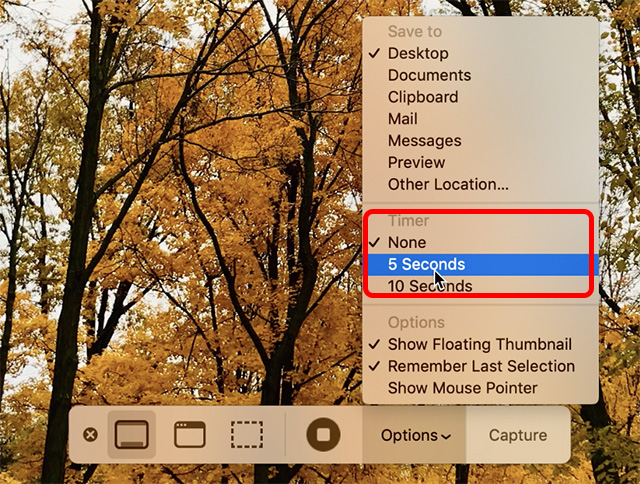
- In one case you're done, just click on Capture.
That's it, macOS Mojave will automatically take the screenshot once the timer expires.
How to Annotate Screenshots in macOS Mojave
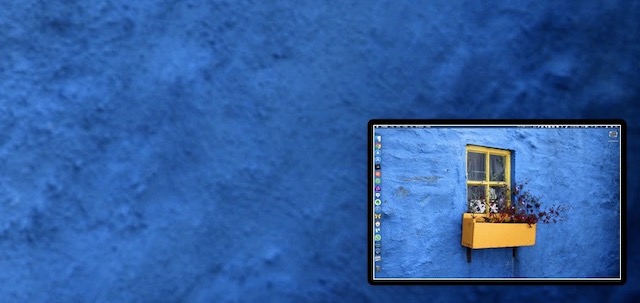
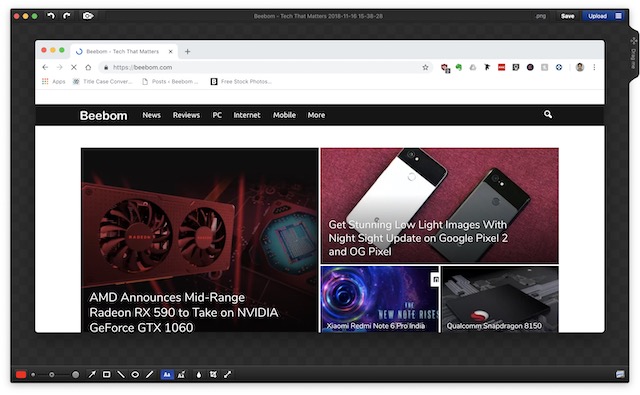
Now that we accept learned how to accept a screenshot on a Mac, allow'due south run into how y'all can annotate the screenshots y'all take. In macOS Mojave, you will detect that whenever you capture screenshots, a small-scale window appears in the bottom right of the screen just as shown in the picture beneath.
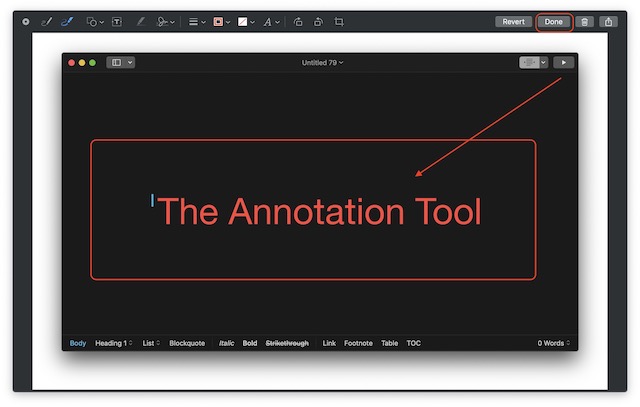
To comment a screenshot, only click on the window and it will open the screen annotation tool. Here y'all tin come across the toolbar at the top and use it to comment upon the screenshot as much as you want. Later on you are finished, just tap on the "Washed" button to relieve the screenshot forth with annotations.
How to Modify Default Screenshot Location in macOS Mojave
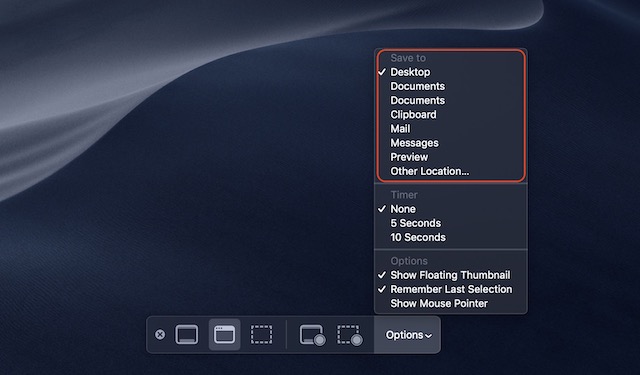
macOS Mojave has too made it easier to change the save destination of the screenshots you take. By default, all your screenshots are saved on the desktop, however, if y'all don't desire to clutter your desktop, you can change the macOS screenshot destination pretty easily. Merely follow the steps below:
- Launch the screenshot tool by either launching the Screenshot app or using the keyboard shortcut Control+Shift+five.
2. Here, click on the Options push button. You will meet that you are presented with diverse options, the first being the "Save to". To change the salve to location, you can either select the options presented or click on the "Other Location" choice to select your own location.
How to Change Screenshot File Format in macOS Mojave
Changing the screenshot file format in macOS Mojave is not something you can do using the macOS screenshot tool. Instead, we volition exist using the Terminal app to exercise this. Here'southward how y'all can alter the screenshot format from PNG (the default format) to anything you want. For this tutorial, I'll alter the format to JPG.
- Open the final, paste the following command, so press enter/return.
defaults write com.apple tree.screencapture type jpg
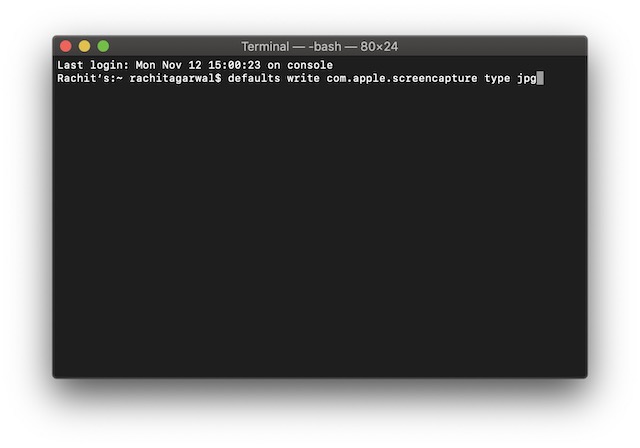
That'southward information technology, your screenshots volition now exist taken in JPG format. If yous want to revert back to PNG, simply supersede the discussion "jpg" with "png" in the terminal command and repeat the process. Similarly, yous can modify the format to PDF by using "pdf" in command and then on.
Best Tertiary-Party Apps to Take a Screenshot on a Mac
While the included screenshot tools are enough for most of macOS users out there, some people adopt to utilise a dedicated third-party tool which offers extra features.If the macOS screenshot tool isn't feature-rich plenty for you, here are 3 best apps to have screenshots in macOS Mojave:
ane. Monosnap
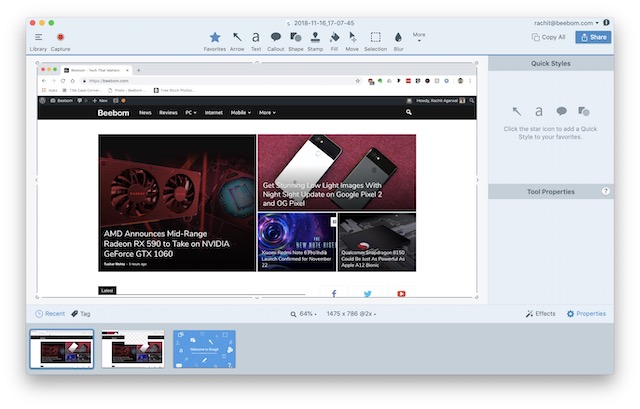
Monosnap is my favorite third-party screenshot app as it is very powerful and completely complimentary of charge. The app lives in your Menu Bar allowing you to easily capture screenshots of your desktop, app, or anything else that you lot desire to. My favorite thing about Monosnap is that the screenshot automatically opens in an editor window assuasive me to quickly modify the file name, file format, and add annotations if required. If you lot are looking for a tertiary-party screenshot tool, yous should definitely give Monosnap a shot.
Install: (Free)
2. Snagit
If you are looking for a really powerful macOS screenshot tool to assist y'all in your professional piece of work, Snagit is the one to look at. While priced at a premium, Snagit is an all-in-one tool for all your MacBook screenshot needs. The app not simply allows y'all to capture the unabridged desktop, a function of the desktop, and app windows, only it also allows you to capture entire web pages, thanks to its scrolling screenshot feature. The app also comes with a born editor which allows you to fully edit the screenshot. I am non merely talking most note here; Snagit offers a full-blown image editing arrangement. The app also allows you to comport out a screen recording of your desktop. If you are a power user and require something that tin match your workflow, this is the app to get.
Install: (Complimentary trial, $49.95)
3. SnapMotion
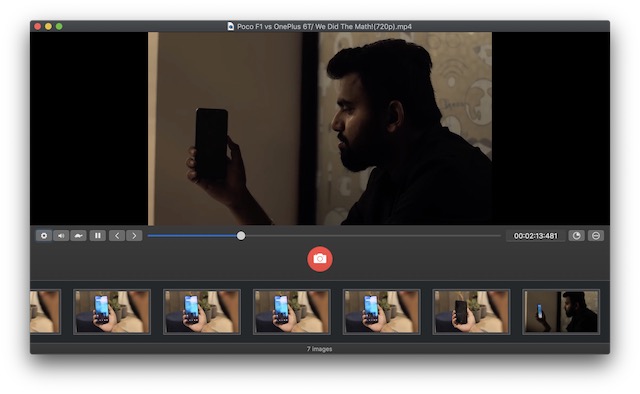
The last app on this list is a fiddling fleck different from your normal screenshot tool. The app basically allows y'all to accept screenshots from a video which is very handy for people who demand to practice that on a fairly regular basis. With SnapMotion, you no longer demand for a video to play and align your tool correctly, and then on. Just play the video using SnapMotion and take a screenshot by clicking on a button. It'south as elementary equally that. In fact, y'all tin can even have automatic screenshots by inputting the number of frames you want to accept screenshots for. Overall, this is a really good tool if you want to take screenshots from a video.
Install: ($8.99)
Run across ALSO: How to Delete Instagram Account
Take a Screenshot on a Mac Using These Methods
Those were all the methods to capture screenshots on a Mac, and I retrieve most of y'all will find the macOS screenshot tool and the new Apple screenshot app plenty for your everyday needs. Nosotros accept also covered methods to change the screenshot destination on Mac, change the screenshot format, and fifty-fifty some bully third party tools to take a macOS screenshot. If y'all come beyond any issues, do let united states know about them in the comments down below and also let us know most any tertiary party apps that you think should be mentioned for taking screenshots in macOS Mojave.

Source: https://beebom.com/screen-capture-mac/
Posted by: laniganbeetunt.blogspot.com
0 Response to "How to Take a Screenshot on a Mac (Guide)"
Post a Comment